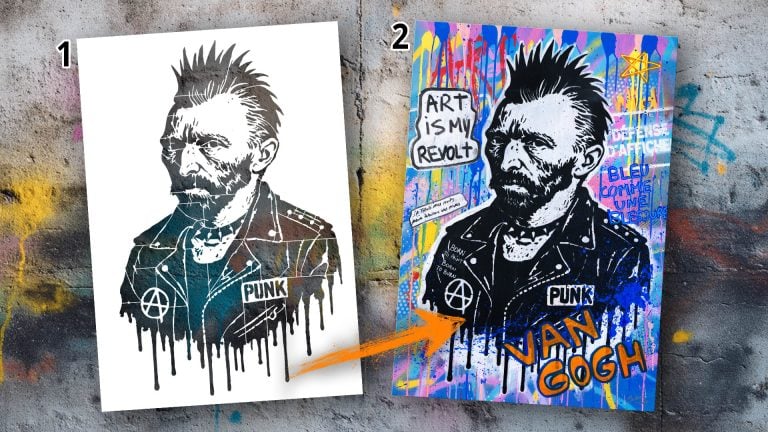
Creating Urban Art with Stencils: Guide and Video Demonstration

Stencil painting is a fascinating and accessible technique that can transform a simple canvas into a spectacular piece of art. In this article, we will explore the process of creating a piece of Street Art using our exclusive stencils. Discover how “Hope in Bloom,” a vibrant painting by John Beckley, was created and get inspired to create your own unique works. This demonstration provides a perfect introduction to creating Urban Art with stencils.
We have prepared a demonstration video to guide you through each step of creating this painting. Watch this video to see how an idea comes to life using stencil painting techniques.
Description of the Artwork
The artwork titled “Hope in Bloom” is a beautiful example of Street Art, featuring a bright yellow rose on a rich, textured purple background. This composition stands out with its use of vibrant colors and modern techniques that immediately capture the viewer’s attention.
The rose, at the center of the artwork, is painted in full bloom with bright yellow petals outlined in crisp black lines, creating a striking comic book effect. The paint drips from the petals add a dynamic sense of movement, emphasizing the contemporary nature of the piece. The green leaves, also outlined in black, provide visual balance to the composition. The purple background is animated with splashes of white, yellow, and blue paint, creating depth and visual complexity that give the impression of an explosion of color around the flower.
Materials and Techniques
To create this artwork, several specific materials and stencil painting techniques are needed. Here is a list of the items used:
- Acrylic paint: Chosen for its versatility and quick drying time, ideal for details and large surfaces.
- Spray paint: Perfect for creating splatter effects and texturing backgrounds.
- Stencil: Designed by John Beckley, this 25.6 x 32″ (64×80 cm) stencil is central to the creation. This stencil is also available in other sizes.
- Canvas: A 25 FIG 25.6 x 32″ (65×81 cm) canvas providing an ideal surface for this type of composition, or a canvas size of your choice.
The techniques employed include creating a complex background, using the stencil with various paint application methods, and adding final touches to give the artwork dynamism and depth.
Design of the Stencil
The stencil used for this artwork was specially designed by John Beckley, an artist passionate about Street Art. Beckley created this stencil inspired by the fusion of urban art and nature, capturing the raw energy of graffiti while celebrating the beauty of flowers. This Street Art stencil is designed to allow artists of all levels to experiment and explore their creativity with ease.
Creation Steps
The creation steps of the artwork “Hope in Bloom” are detailed below:
Creating the background: To begin, John created a background with violet paint.

Adding complexity to the background: He then added colors to create a complex background that would be placed behind the flower. Here, the background is very important as it greatly contributes to the final result.

Applying the stencil: John then placed the stencil and applied a layer of black spray paint. Note that you can also use a paint roller or a stencil brush. Using spray paint is not mandatory.


Melodious Rose Stencil – RM012
Filling the rose in white: He filled the inside of the rose in white with a paint roller. You will notice that he deliberately went over the edges to bring a raw style to the background and recall Street Art, where backgrounds are often made in a hurry.

Refining the background: John then reworked the background to refine the details and colors.

Second stencil application: The stencil was replaced and a new layer of black paint was applied to clearly see the elements of the flower that had been covered by the white paint layer. Alt text: Second application of black paint with the stencil.

Filling the rose petals in yellow: He then filled the rose petals in yellow. Alt text: Filling the rose petals in yellow.

Painting the leaves in light green: The rose leaves were painted in light green. Alt text: Painting the rose leaves in light green.

Adding light areas: John added whites to the petals to create light areas. You can look at the photo to see where to add these light areas.

Adding paint splatters and colors: Paint splatters and colors were added with a pipette to bring liveliness and movement.


Final stencil application: The stencil was replaced one last time and a final layer of black paint was added to strengthen the contours. Alt text: Final application of black paint to strengthen the contours.

Covering the stencil junction points: The stencil junction points were covered with black paint sprayed into a cup. Alt text: Covering the stencil junction points with black paint.

Adding shadow areas: John added black to the shadow areas of the rose. You can use the shadow areas on the stencil as a guide.

Adding paint drips: Finally, black and yellow paint drips were added in some places over the black stencil to enhance the Street Art effect.

These detailed steps show how a piece of Street Art can be created with stencils, combining different techniques and colors for an impressive and dynamic result.
Presentation of the Finished Artwork
The final result, after following the creation steps, is a stunning piece of urban art that will surely inspire and captivate. “Hope in Bloom” stands out with its vitality and dynamism, each detail of the yellow rose to the vibrant purple background reflecting a technical mastery and passion for Street Art. This painting is not only an impressive decorative piece but also a powerful symbol of hope and renewal.


Invitation to Paint and Recreate
We encourage our readers to embark on the adventure of artistic creation. Whether you are a beginner or an experienced artist, our stencils are designed to make the creative process accessible and enjoyable. Get inspired by “Hope in Bloom” and feel free to experiment with colors, techniques, and supports to create your own version of this artwork.
Stencil Purchase
For those who wish to explore urban art creation with stencils, you can purchase the stencil used in this demonstration directly from our online store. Click the link below to discover our full collection of exclusive stencils.

Melodious Rose Stencil – RM012
Discover the Rose Melody Collection
This stencil is part of an exclusive collection of 12 stencils titled “Rose Melody.” This collection offers a variety of unique designs, all inspired by the beauty of roses and the dynamic style of street art. Each stencil in the collection is designed to help you create striking and original works of art. To learn more about this collection and discover all the available stencils, check out this article: Rose Melody Stencil Collection.
Invitation to Comment on the Article
We would love to hear your thoughts and experiences. Have you ever used stencils to create artworks? What are your tips for beginners? Share your thoughts and creations in the comments below!
Conclusion of Creating Urban Art.
Creating urban art with stencils is an exciting and accessible adventure for everyone. With the right tools and a bit of inspiration, it is possible to create impressive and meaningful artworks. We hope this article and demonstration video have inspired you to try it for yourself. Don’t forget to visit our store to discover all our stencils and join us on this wonderful creative adventure.
FAQ
Can stencils be used on surfaces other than canvas?
- Yes, stencils can be used on various surfaces such as wood, metal, walls, and even fabrics.
What types of paint are best suited for stencils?
- Acrylic paint and spray paint are ideal for stencils due to their versatility and quick drying time.
How to prevent paint from bleeding under the stencil?
- Tip for sharp edges: To prevent paint from bleeding under the stencil and achieve clean, sharp lines, use adhesive tape to secure the stencil. You can also weigh down the edges of the stencil with small weights like washers. John often uses the tip of a brush to hold the stencil in place during application. Magnets are another effective solution, especially if you are working on a vertically positioned canvas. Apply the paint in thin, light layers for optimal results.
- Tip for an authentic Street Art effect: Conversely, if you prefer the raw authenticity of Street Art, consider a slightly different approach. To capture the essence of a piece created in the urgency and ephemerality characteristic of street art, do not weigh down the stencil. This method intentionally allows some paint to bleed under the stencil edges, creating less defined contours that evoke the hurriedly painted Street Art pieces on urban walls. This slight blurring of the lines adds a dimension of spontaneity and authenticity, reminiscent of pieces created in the heat of the moment.
Are stencils reusable?
- Yes, with proper care, stencils can be reused indefinitely or nearly so. Clean them carefully after each use if necessary and depending on the thickness of the paint layer. For example, with spray paint, the layer being thin, it is not always necessary to clean them after each use. However, if you are working with a palette knife and a lot of paint, cleaning is required.
What are common mistakes to avoid when using stencils?
- Avoid applying too much paint at once to prevent bleeding, and make sure the stencil is well secured for sharp lines.
How long does it take for the paint to dry completely?
- The drying time depends on the type of paint used and the thickness of the layers, but generally, acrylic paint dries in 1 to 2 hours, while spray paint can dry in 15 to 30 minutes. You can use a hair dryer to speed up the drying if necessary.
Can multiple stencils be used in the same artwork?
- Yes, using multiple stencils can add complexity and depth to your artwork. Make sure to plan your composition well and let each layer dry before adding the next elements.


